Friday, October 31, 2008

Printing Large Format Maps in European Sizes

Customer Question: Hi! we need to do a presentation for the company I'm
working for. We need a digital map, because we're going to print it in
Europe. The size of the printing will be fairly large. Do you by any
chance have the possibility do provide a digital map in that size or do
you've any suggestions for me to solve this task?

Answer: Hi, thank you for visiting and for your questions. We have two
options. I am assuming that you are printing and not using PowerPoint.
If the presentation is in PowerPoint then you would just use our
standard PPT maps and adjust the slide to the size you need.

If you are printing you are usually working on some kind of desk top
publishing program like InDesign or Quark to lay out the document. With
these you can set up any size page you want. For the map you would use
our Adobe Illustrator eps version and do your customization in
Illustrator or CorelDraw or some kind of drawing program like that. In
these program you can scale the map to any size. You can also scale the
map to any size once you bring it into InDesign or Quark. EPS files are
vector files so you can make them any size you need and the resolution
doesn't change. They are line drawings and can be customized however
you need.

A second option if you don't have the Adobe kind of products is to do
all of your work in PowerPoint. You can set up custom page sizes and do
your work that way. Many of my customers work like this because they
don't have the graphic design programs. Set up your custom page size
first and then copy and paste your map into the slide. You can check
out our videos for tips on doing this,
http://mapsfordesignhowto.blogspot.com/

I would also check with your printer and see what kind of files they
would like to receive. Printing is different than working on the
computer screen. You are often working with 4 color CYMK files instead
of the 3 color RGB computer screen kind of file. Check with the printer
on this, it will save you a lot of grief later.

I hope this helps, if you have more questions please feel free to
contact me. We also have many sample that you can download to test.

thank you, bruce jones
Thursday, October 30, 2008

10 How-to-Lessons on Editing PowerPoint Maps

We have finally filled out our How-to-Customize your PowerPoint maps
email lessons. We now have 10 lessons that flow out on a regular basis
to subscribers. Containing, how-tos, tips and hints on getting the
most our of your editable PowerPoint maps. So make sure you sign up on
our blogs and get on the list.

We received a very nice comment on the lessons from one of our
subscribers, it is always great to receive feedback, thank you.

> Dear Bruce,
>  
> Thank you for the tutorial.  I will need this in the next few months
> as we change territories within the US maps.  So thank you so much. 
> As I start to work on this and if I find it difficult to follow the
> instructions I will call you.
>  I'm still grateful for fixing the immediate issues I had last week.
>  
> Thank you so much.

I answered like this: thank you very much for the comments, I am glad
the lessons are helping. I am also glad to help if you get stuck. Feel
free to call or contact me.

thank you, bruce

Re: Part 1: Dividing a State, County or Country in Half to Show Two Sales Territories

> The object of this lesson from World of Maps is to divide a state,
> county or country map in half and assign it different colors to
> show two territories. This will be a two part email lesson.
>
> PowerPoint isn't really a drawing program but we have found a
> couple of ways of doing this.
>
> Option 1
> 1. Our first option is to use the EDIT POINTS Tool. The first step
> is to duplicate the object. Copy the state or county and paste it
> right on top or on the side of the existing state so that you can
> work on it.
>
> 2. Select the state with your mouse pointer; watch for the eight
> little handles to tell you it is selected.
>
> 3. Go to the DRAW Pop-Up menu in the Drawing Tool Bar and select
> EDIT POINTS, you will now see all of the drawing points or handles
> that make up that map.
>
> 4. While you hold down the Control key on the PC or the Option key
> on the Mac, you click on each point with the mouse pointer and
> start deleting the little points.
>
> 5. The object is to nibbling away the area you want to delete while
> your work your way around the edge. You end up at some point with a
> part of the state. Don't worry it goes faster than you think.
>
> 6. Give it its own color and stroke or line and place it on top of
> the original map. And presto you have a state that looks to the
> viewer like you have cut it in half. But in reality it is made up
> of two pieces, a full state and half state lying on top.
>
> TIP: Use the Zoom pop-up box in the Standard Toolbar to get in
> closer. 200% or 300% works well.
>
> Video
> To review our How-To-Videos please click this link on the link in the
> upper left corner to the How -To Page
>
> About the Maps
> World of Maps is a collection of royalty free, editable MS
> PowerPoint and Adobe Illustrator EPS clip art maps. The maps are
> perfect for sales and marketing presentations, showing sales
> territories and regions, advertising, graphic design, building maps
> for websites, craft and scrapbook projects, developing a map
> worksheet for a class, anywhere a royalty free map is needed.
>
> Collection includes: World Projections, USA, States, County,
> Countries, World Regions, and Global maps. Each state, country or
> block of text is an individual element that can be customized,
> changed, deleted, or colored however you like.
>
> Maps are sold individually at http://www.mapsfordesign.com or on a
> subscription basis at http://www.bjdesign.com. Immediate download
> to your computer, or on CD-Rom.
>

Wednesday, October 29, 2008

Bosina, Georgia, Kyrgystan, Ukraine new Clip Art Maps


Bosina, Georgia, Kyrgystan, Ukraine, just some of the new editable clip art countries we have been working on. We have about 25 that have been in production for a while. We have done the Adobe Illustrator, PowerPoint and JPG versions. It just takes a while to get them all set. Along with these is a World Mercator Map with county names, this has been on mapsfordesign.com but not the CD, it will in the next release.

One of the interesting maps that has been selling alot lately has been our US National County maps. This map has over 3,000 counties on it. A change that we will be adding to the CD will be this map with the county names in place. This is a big complex map but many customers work with it and it is very popular. In both Adobe Illustrator and PowerPoint. Names will only be on the Illustrator version.

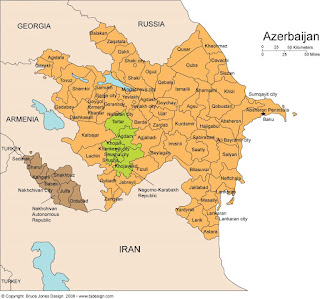
Above is our Azerbaijan map.

Saturday, October 18, 2008

Coloring a State or Country in a PowerPoint Slide

Today’s lesson from Maps for Design is about coloring map elements in your PowerPoint Clip Art Maps.

1. Click or Select the state or country that you want to color with the mouse pointer by clicking on it. On the PC use the right button of the mouse, on the Mac just click with the mouse.

You can tell something is selected because you will see 8 little boxes or handles appear around the edges, this tells you the object has been selected and you can now do something to it.

2. Choose a color from the Fill Bucket in the Drawing Tool Bar usually located along the bottom of the PowerPoint slide. Or choose a color from the Colors, Weights and Fills option in the Format Palette. This Palette is located in the VIEW pull down menu.

3. When done deselect by clicking off the image and start on your next one.

TIP. Holding down the Shift Key on your keyboard allows you to select and change several objects at the same time to make the project go faster.

Every object in PowerPoint is made up of a fill color and an outline or stroke color, both can be changed independently of each other.

Video
To review our How To Videos please click this link or copy it into the address section of your web browser.
http://mapsfordesignhowto.blogspot.com/